How to Pitch Camping Tents Like a Pro!

Ever had the problem of having to pitch your tent after a long drive up to the camp site? We certainly have! That’s why we’ve come up with some simple and easy tips to guide you through the process of setting up your camping tents no matter what the size or material.

1. Find the right spot for your tent – This is a great place to start. You want to find a spot that is mostly flat and free of rocks and sticks. There is nothing worse than trying to get to sleep when something is stabbing you in the back. Another great thing to watch out for is any low hanging branches, as these can be dangerous if winds pick up. You should also make sure you’re not too close to waterways such as rivers or creeks.
2. Use ground sheet protection – Tarps, ground sheets and/or mesh annex flooring are the best products to use when wanting to lay out a footprint for camping or hiking tents to go on top of. These provide insulation from the cold of the earth coming through, as well as protecting and preserving the bottom of your tent and being an extra waterproof layer. Even the best canvas tents in Australia should have some ground sheet protection. A good suggestion is to find a tarp that is a little smaller than your tent so you can avoid pooling of water. Make sure to peg your ground sheet down!
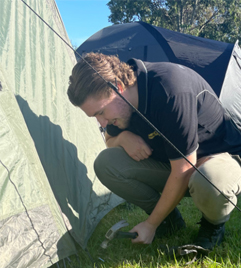
3. Lay out the base of the tent – Lay out your tent over the top of your ground cover. When working out the spot you want it in, make sure to consider which way the wind is blowing and the direction of the sun. This is important whether you’re putting up canvas camping tents or dome tents in Australia! Once you’ve found the best location, pull it tight and peg it out.
4. Put your poles together – The easiest way to work out your poles and where they go is getting them all out and setting them all up. Make sure all the poles connect perfectly and are the proper size. This makes it easier to pick which one goes where. After a few trips, you may find that colour coding your poles is a smart idea, as this will help you distinguish which poles go where, making it quicker when setting up your tent in the future.
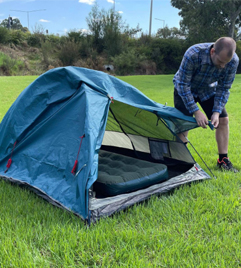
5. Put the poles into the tent base – At this point, you need to match the poles to the tent. Most camping tents will have grommets or keys for you to put your tent pole end into. Your tent poles will usually cross over each other to make the structure stable. Once you have put all the tent poles in, you will need to clip the tent base to the poles. This will then make your creation look more like a tent!
6. Grab your fly and put it on – Make sure to lay out your tent fly before putting it on your tent base. This is to make sure the fly is both the right way around and ready to match up with your tent. Ensure that both doors match up to each other, then connect the fly to the main tent by using either the clips or Velcro.
Building your tent can be an annoying and frustrating task, but it doesn’t have to be. These steps aim to make setting up your camp site just that little bit easier, so you can get out there and focus on the fun side of camping!


